7th Feb 2018
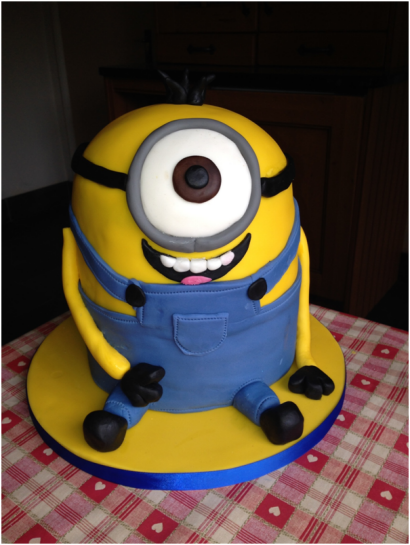
How to Make a Despicable Me Minion Cake
Office blogger Charlie shows you how to make your very own Minion cake.
Since the launch of Despicable Me in 2010 kids worldwide have gone crazy over those funny looking little yellow Minions which have become such a loveable character and almost a household name. With Despicable Me 2 launched in 2013 the Minion buzz continued, and when Despicable Me 3 released in 2017 Minion mania went stratospheric!
For parents, the request for Minion birthday cakes come in thick and fast, and what better way to put a smile on your little ones face than with the Minion cake of their dreams. But where do you start?
With our tutorial from patisserie expert Catherine Parker anyone can make their own Minion cake for their toddler’s birthday celebrations!
Let’s get started!
1. Firstly, select your favourite playlist and pump up the volume!

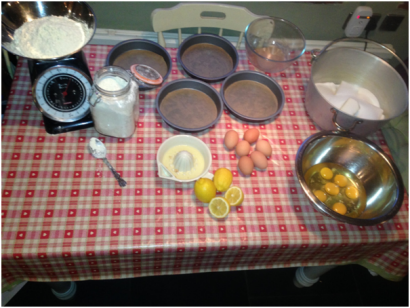
2. Prepare four sandwich tins and a domed bowl of your choice by greasing and lining with greaseproof paper. Heat oven to 180 degrees.
3. For this particular cake I used the following recipe for a Madeira cake:
- 700g butter
- 700g caster sugar
- 700g self raising flour
- 350g plain flour
- 12 eggs
- Zest and juice of 1.5 lemons
Tip: Madeira cake holds its form much better than an average sponge cake making it easier to cut to shape and also slightly denser so that it holds the weight of the fondant nicely. The slight lemony flavour also stops the cake from becoming too sickly once the icing is added.
This recipe made a Minion cake approximately one foot tall but you can easily scale down or up by halving or doubling the recipe as required.
4. Cream the butter and sugar together with the lemon juice and zest. Gradually beat in the eggs. If the mixture curdles just stir in a little flour but don’t worry too much as it will all come together.


5. Sift both flours in to mix and gently fold together. Pour into prepared tins and bake until a skewer comes out clean (about 25 minutes for the sandwich tins and about an hour or so for the larger cake).
6. Make a cuppa and put your feet up for the duration of the cooking time.
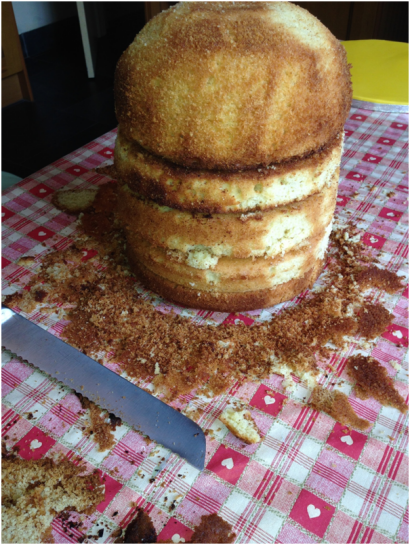
7. Once cooked and cooled, stack the cakes together and trim to the desired shape and size.
Tip: If you have plenty of time, thoroughly wrap and freeze the cakes. This makes them much easier to trim. Ensure they are completely defrosted before icing.
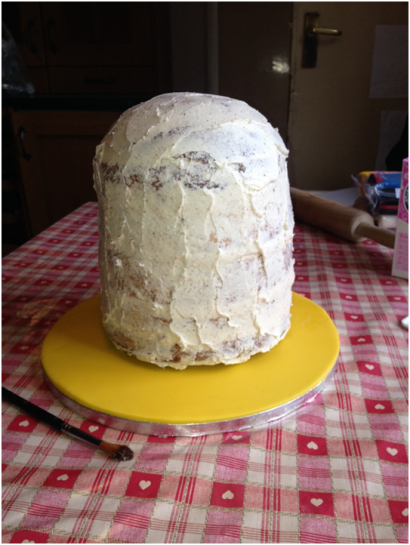
8. Sandwich the layers together with vanilla flavoured butter cream. Cut the domed cake in half and sandwich back together with butter cream. Cover the entire cake with a thin layer of butter cream and allow this to ‘set’ for a few hours, or preferably overnight.
Tip: Although not absolutely necessary, I like to ice the board with either matching or contrasting fondant and trim with a ribbon as I just find this sets the cake off nicely.
9. Cover the entire cake with a layer of bright yellow fondant then cover the lower third with blue fondant.
Tip: Don’t use icing sugar to prevent sticking when rolling out fondant – it’s too gritty. Use cornflour as this is also easier to brush off with a clean paint brush without marking the fondant.
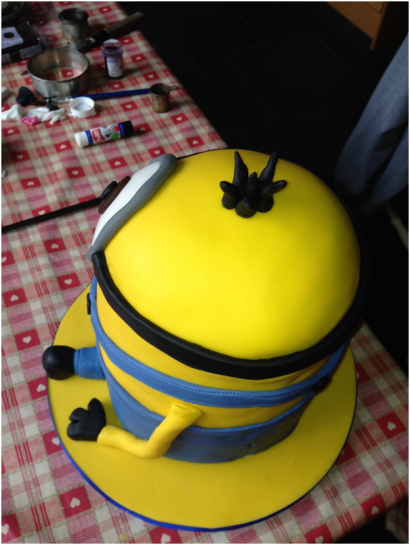
10. Add blue fondant legs, dungaree bib and braces and a pocket. Using a stitching wheel to mark the edges of the dungarees.
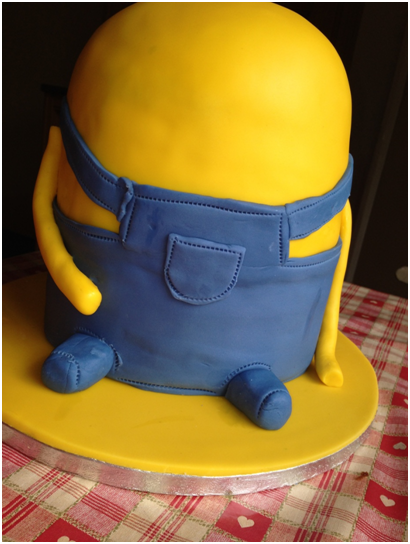
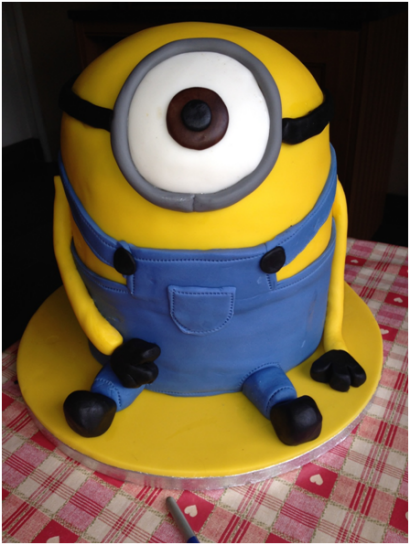
11. Add minion arms in yellow and then simple feet and hands in black fondant.
12. Add a large central eye with white fondant, an iris and pupil in brown and black, outline with grey fondant and add a black fondant strap around the head.
Use a plain round cutter to shape the mouth, add teeth and tongue and a little black hair and…TAA DAAH!!
Mission Accomplished!
So there you have it, you’re perfectly finished Minion birthday cake for your little one!
We’d hope you found our tutorial useful and we’d absolutely love to see you Minion cake photos. Send your photos to hello@dnakids.co.uk, Tweet your photos @dnakidsparties or send us your photos to DNA Kids on Facebook or Instagram.
Happy baking everyone!


Login to My DNA Kids
Please enter your booking reference and password below. You can find these on your booking confirmation email.
Forgotten Password
Please enter your email address below...
Forgotten Password
Thank you. We have emailed you details of how to reset your password if your email address matches one of our parties.
If you can't find the email, please check your spam folder.


